Installing TimeKeeper
Installation and setup of TimeKeeper is very simple:
- Install any dependencies (see below)
- Run the installer with your license file in place
- Edit the configuration to set the time sources and options
- Start TimeKeeper
- Verify that TimeKeeper is working and running properly
(See the “Updating” section for instructions on how to update TimeKeeper and its license.)
On both Windows and Linux, the TimeKeeper web interface allows you to manage configuration, verify time sources, and more.
Dependencies
TimeKeeper requires dependencies on some Linux distributions. These dependencies vary by distribution and TimeKeeper features enabled.
RHEL 10, AlmaLinux 10, Rocky Linux 10 and Amazon Linux 2023
dnf install libxcrypt-compat
Note: This dependency is expected to be removed in a future release due to its deprecation.
Install process
If you don’t have TimeKeeper yet, contact FSMLabs or your FSMLabs' resellers for an evaluation. You’ll be provided with the installer and a license file.
Once you’ve got your copy of the software and a license file (timekeeper.lic), put them both in the same directory and run the installer:
$ # Ensure the binary is executable
$ chmod +x timekeeper_installer*
$ ./timekeeper_installer*
On Linux, the binary installer requires superuser privileges. It must be run as root.
When downloading installers on some version of IE, it may add “.man” to the end of the file. Please remove the “.man” portion after downloading.
On Windows the installer can be run from File Explorer, and will ask for elevated privileges if needed.
Configure TimeKeeper
TimeKeeper’s configuration is stored in /etc/timekeeper.conf on Linux, and %ProgramFiles%\timekeeper\timekeeper.conf on Windows, which is normally C:\Program Files\timekeeper\timekeeper.conf.
There are a lot of reference options listed in the existing timekeeper.conf file to show different scenarios. Lines that start with a # are comments, and most of the file will be made up of these showing different configurations. Leave these sections as comments if you’re not using them.
The first step is to set up at least one time source, which we’ll call “source 0”, and enable the web management interface, set up in the timekeeper.conf file like this:
SOURCE0() { NTPSERVER='ntp_server'; }
ENABLE_WEB_MANAGEMENT='1';
WEB_MANAGEMENT_PORT='8080';
This will make TimeKeeper get time via NTP from ntp_server as its primary source of time. You can specify many different time sources with different protocols as SOURCE1, SOURCE2, up to 50 sources, where the lowest source number is the highest priority source. We’ll cover all these options in more detail later on.
It will also enable the web management interface, running on port 8080.
Start the service
Once TimeKeeper’s installed and configured, the service is ready to be started. You can do that on Linux with:
$ systemctl start timekeeper
Non systemd-based systems can be started similarly with service timekeeper restart.
On Windows, either start the service via the Windows Management Console, or from a command prompt running as Administrator with:
C:\> sc start timekeeper
Verify TimeKeeper is working
Now you can run tkstatus to get a quick overview of the system state, or connect to the web management interface (http://localhost:8080), and login with username “admin”, default password “timekeeper”. Note: In earlier versions of TimeKeeper the default password was “fsmlabs”.
The tkstatus output may look similar to this:
TimeKeeper Status
================================================================================
TimeKeeper version 8.0.16
License is permanent.
Primary source is: 0
Primary source offset: 0.000000011 seconds
Primary source type: NTP(10.0.0.12:GPS)
Last time update: 1 seconds ago

Src|offset      |source type                     |update age(s)|timestamp type
================================================================================
  0 +0.000000011               NTP(10.0.0.12:GPS)             1  TIMESTAMPING_HW
Similarly, the web status page will show:
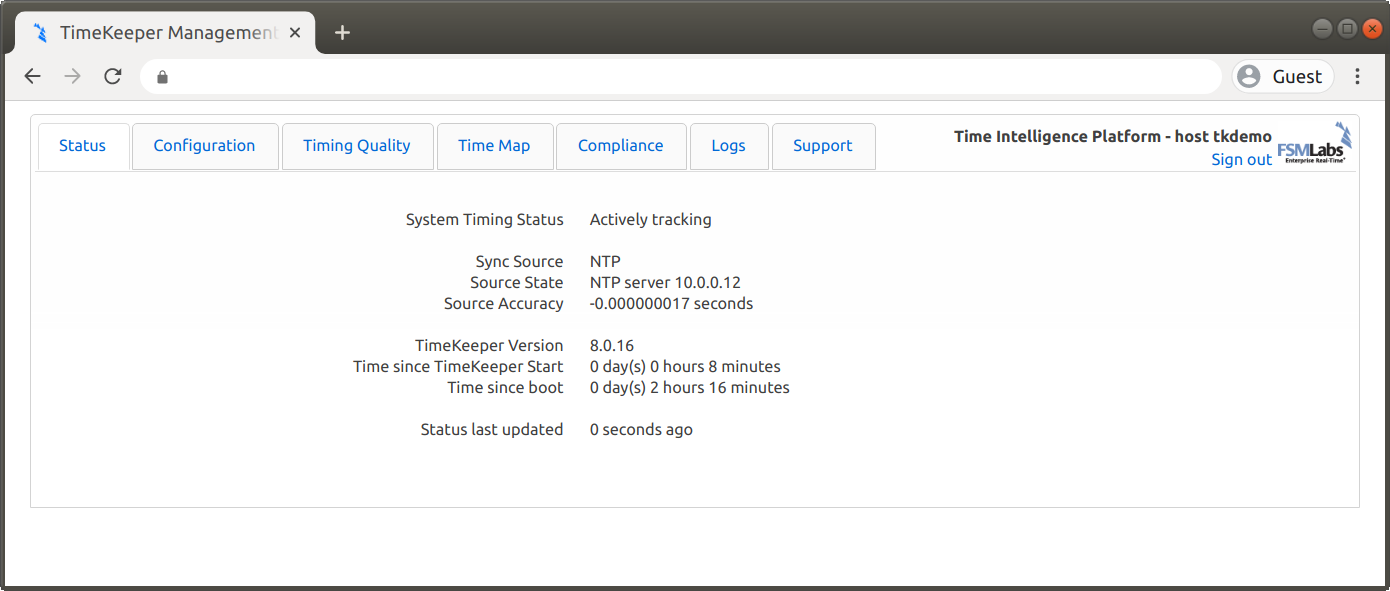
You can also see the individual NTP time updates on the web interface under the “Timing Quality” tab, or in /var/log/timekeeper_0.data on Linux, and var\log\timekeeper_0.data under the TimeKeeper installation on Windows. We’ll cover those files and views in much more detail later, but at this point, you’ve got TimeKeeper running, and we can start looking at using the more advanced features.